Performance Products
Battery Packs
Blower Starters
Brake Components
Chassis Components
Control Cables
Enderle Fuel Injection
Engine Accessories
Fttings - Plumbing
Fuel Filters
Fuel Pumps
Gaskets
Gear Drives
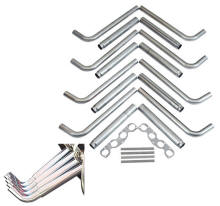
Header Kits
JAZ Products
King Engine Bearings
Magneto - Ignition
Mechanix Wear
Neat Stuff
Oil Systems
Oils - Additvies
Piston Rings
Safety Equipment
Supercharger Products
Starters
Tools - Pit Equipment
Waterman
Weekend Specials!
Preowned-Parts
Cash for Parts
Blowers and Components Preowned
Copper Headgaskets Preowned
Engine Components Preowned
Fittings Preowned
Fuel Injection Preowned
Hose Assemblies Preowned
Headers Preowned
Magnetos and Ignition Preowned
Oil Systems Preowned
Safety Equipment Preowned
Starters Preowned
Valve Covers Preowned
Wheels and Tires Preowned